
Fig 4.1 - the options bar.
Most of the sections including the user manager follow the same format. When you go into a section, you will see the 'options bar' at the top (figure 4.1), together with some of the data from the table listed in a table format such as in figure 4.2.
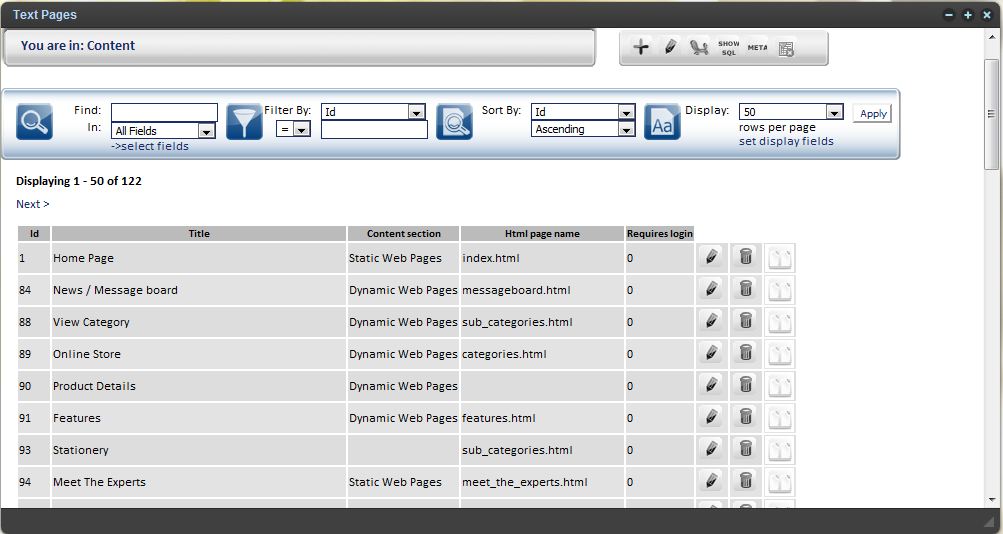
Click on figure 4.2 now and take a look at a full data listing screen, noting that the columns displaying include 'Title' and 'Content Section' amongst others.
The columns shown are not every field in the data table itself, merely useful ones which allow you to identify each record, and different columns will display as default for each section you can edit. You can also see how many records that you are viewing on that page and how many others there are. 'Next' and 'Previous' page buttons will be found by this information, allowing you to scroll through the pages of data records in bulk.
By each row on the right hand side are various icons depending on your user permissions. The important ones for now are edit and delete which you can click to edit and delete that data respectively.
Lets look more in depth at the options bar at the top of the data listing.
Take a look at Figure 4.1 in greater detail by clicking on the image above again, and note that the options bar is split into four sections: Search, Filter, Sort and Display. Using these options you can modify the records that the database returns. All of these four options work together so that you can search, filter, sort and change the display options of a recordset in one go, and click 'Apply' to apply your settings. You can click 'Clear' to clear all your filtering and return to the default view at any time. (NB: the Clear button does not appear in the above diagram as the list has not yet been filtered at the time of the screenshot).
Let's take each of these sections in turn:
Search: Allows you to enter a string of text to search for. Underneath this you can select where you want to look. The default is normally 'All Fields'. You can click on this drop down list and select a specific field to search through if you wish. Please note that 'All Fields' actually only searches through the fields that are visible in the listing at the time. (Development note: This will be altered in the future to say 'Visible Fields' and the 'All Fields' option will actually search through every single field in the table.)
Currently if you want to search through a field that is not visible in the list view, you should edit the field list in the 'Display' section of the options bar (covered shortly), and this field will then appear in the 'search fields list' - ie beome available to searches. In addition the 'All Fields' option will search through this field now as well.
Filter: Allows you to filter values on whether they are greater than, less than or equal to a value which you can enter into the box at the bottom. The greater than and less than are for use on numeric and date fields only. The = function an be used on any type of field, however this differs from the search function in that = means the value entered has to match exactly, whereas the search is more general and will match if only part of the field matches what you have entered.
Sort: Allows you to choose a field to sort the returned data list by, and you can also choose Ascending or Descending. Please note that ascending when applies to text fields goes A-Z. You can only sort the records by fields which are currently displaying in the list at this present time.
Display: Firstly, here you can choose how many records to split each page into. Default options are 10,20,50,100 or All. Underneath this you have 'Set Display Fields'. This is where you can choose what fields from the actual table you display in the list. If you click on this you will see a pop up with two lists. The first is a list of all of the fields in the data table which are not currently being shown in list view, and the second is the ones which are. Use the mouse to drag and drop fields from one list to the other to change which fields are displayed in list view, and you can also drag and drop to change the order in which they appear. Click 'Go' to change the display list immediately.
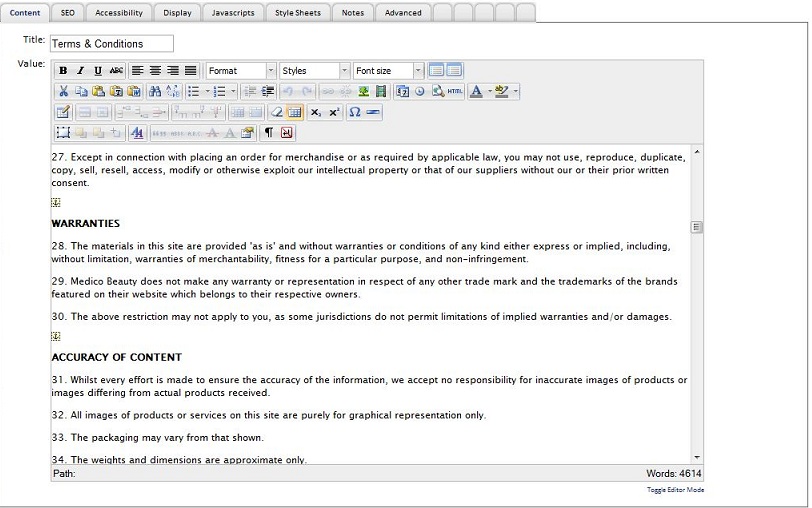
The edit icon takes the form of a pencil icon. Click on the edit icon by any record in the listing to bring it up in the edit screen.
Here you will be able to change various fields within the specific data record. Each section will have different fields but they all work in the same way. Just edit the fields you want and click ‘Save’ at the bottom to save your changes.
Many fields are simple text entry boxes, figure 4.3 shows a text entry box for 'title', and a more advanced text entry box for 'value' with further options, which is the 'Rich Text Editor'.
Rich Text Editor: Some fields are editable within the Rich Text editor. These fields are largely the main content sections of pages. The rich text editor contains a number of features which allow you to style the look of your text as well as the basic content. There are many features available from bold, italics nd underline to changing font colours, formatting as bulleted or numbered lists, and the ability to insert images and links. Most of this is fairly self explanatory and hovering the mouse over each button gives you a brief “tooltip” explanation of the functionality as a pop up. The full functionality of the rich text editor is covered in the separate page “Using the Rich Text Editor”.
Other field types:
• Select lists, check boxes and radio buttons are also used where convenient.
• Any field which stores a file which you can upload will be made up of a file upload field, sometimes with extra options - for example the ability to browse for files which have already been uploaded to that section.
• Dates may have date picker fields, or be made up of three select boxes allowing you to select date, month and year.
• Fields which contain images may contain the ability to upload a new image, or browse the filesystem to find an image already uploaded - these are covered in more detail under the Image Manager section.
 Deleting Data
When you have clicked into a section and are viewing records, next to the edit button is the delete button. If you click this you will be asked if you are sure you wish to delete the record. Press ok to confirm and the record will be deleted.
 Adding Data
At the top of each section, you will also see an icon for adding a new record to the table. Clicking on this gives a form very similar to the edit screen, except for the fact that all of the fields are empty. You can enter the new data into here, and click ‘Save’ to save the data out. You will now see it listed in the table as a new record, and it will also appear on the web site too.
 Editing in Spreadsheet Mode
Spreadsheet mode allows you to edit multiple records at once. The button to enter spreadsheet mode is next to the add data button, and like the last edit button has a pencil icon. Spreadsheet mode allows you to edit the current recordset that you see on screen. You can edit the Many times there are two save buttons - one with a pencil icon over the save icon. This one means 'Save and continue editing' whilst the first will save the data and put you back to the record listing page.entire table by selecting 'All' under 'Records Per Page'. If the listing preview does not contain the fields you want to edit you can add these from the 'set display fields' underneath the Records Per Page selector as explained above under 'Viewing And finding Data: Display'.
Please note that spreadsheet mode does not allow upload of files and images at present.

Save Button - The save button is at the bottom of the edit screen. Many times there are two save buttons - one with a pencil icon over the save icon. This one means 'Save and continue editing' whilst the first will save the data and put you back to the record listing page.

Reset Button - The reset button is also at the bottom of the edit screen, and normally on the right hand side of the page. The reset button will return your entire form to the exact content it displayed when the page was loaded before you started editing. Note that there is not an 'un-reset' function and this affects every field on the form.
Further Support
For
further help and support, please contact Paragon Digital on 0775 646 0555.