Using the Rich Text Editor
A quick start guide to using the rich text editor
The rich text editor can be found in many places in the web admin, and follows a similar format to other word processing software. Many standard tools are available including colouring and styling text, and inserting images and tables, along with automatically linking to other pages and files. There is also a section about pasting from word and other rich text formats.
The header toolbar looks similar to the below:

All of the buttons will pop up a tooltip explaining what they are for as you hover the mouse over them.
Pasting Text
You can copy and paste text directly into the editor. Rich text (text with styles already applied) is supported in the paste operation, however due to essential differences with rich text in applications such as Word, PDF and files etc, you may only get a close copy of the text you have copied.
Pasting Rich Text from Word / PDF etc
 - The paste from word button pastes text in a different manner and is helpful with dealing with awkward word documents. The main use of this button is translating the font and style information into a better format for the web. There are however two difficult onversions with word documents (and also PDF files) - single line spaces may become multiple lines, and tables may not display correctly. Extra line spacing must be removed by hand after pasting. If you are pasting in tables of data it is advisable to paste these in separately from the rest of the text afterwards. For example, if your document contains a table in the middle, copy and paste the top and bottom of the document in, then copy and paste the table into the correct position afterwards.
Pasting Plain Text
 If you don't want to copy styles and just the text, then the paste as plain text button will allow you to do this. This button has toggle functionality - that is each time you click it it will turn plain text pasting mode either on or off.
Removing Extraneous Formatting
 The Remove formatting button can be used after pasting rich text to pull out un-necessary formatting. If you have any trouble with this button then select larger portions of text than just the formatted text as the formatting information may not be being highlighted as you highlight the text in your document.
Basic Formatting
 - Highlight your text and use these 4 buttons to make text bold, italic, underlined, or strike-through.
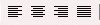 - Alignment: Highlight your text or select an image and use these buttons to align your content. The final button is for justified text.
 Bulleted Lists: these two options automatically create lists - the first with bullets, the second with auto numbering.
 Out-dent (move left) and Indent (indent right).
 Undo/redo - Undo (Ctrl+Z) and Re-do (Ctrl+Y) the formatting you just made to your article.
Linking to other pages and files
 Insert/Edit Link - Both text and images can be used as the source of a link to another page. To insert or edit a link, select the text that is/will be the source of the link exactly, and press this button. A pop-up dialog displays that lets you enter the link URL (or select a page from your web site or file from the file manager from the field below).
The selected text or image will now serve as a link to this page or file.
Target windows/tabs: By default web pages will open in the same window and browser tab as the link which is clicked, and the new content will replace the old content. If you'd rather the link opened in a new browser tab, you can select New Window (_blank) from the list under the 'Target' Header. Please note that the text 'New Window' refers to a new window OR tab - essentially not all browsers support tabs, in which case an entirely new browser window will pop up. Either way it will leave your existing page loaded in the browser so when the new window/tab is closed the user will be returned to your document. This is often useful when providing links to external sites when you hope the user will return to your site afterwards as they can just close the tab down and be back on the web site.
 Unlink - To remove a link, highlight the text (or click on the image) which provides the source of the link and press this button. This will remove the link from the item and it will return to basic text or a standard image file.
 Insert/edit anchor - Creates a named anchor which can be used as a target to jump elsewhere in the same document as a link target. To do this just place your cursor in the document where you would like the named section to start and click the anchor button. This will allow you to choose a name. To link to this part of the document, follow the instructions above but instead of entering a URL, type the # sign followed by the name you entered previously. The end result is that if someone clicks on this link the document will scroll down (or up) to the place where you inserted the named anchor.
Images and multimedia
 Insert/Edit Image - To insert an image, place the cursor in the desired location and press this button. A pop-up dialog displays that lets you enter in the Image URL and other information about how the image will display.
 Embed Media - For youtube videos and more, place the cursor at the desired location in your document and click this button. A pop-up dialog will display that allows you to enter the embed code from youtube and other information.
Tables 
Tables are one section it is worth spending a few minutes practicing with to see what is possible before jumping straight into editing. The buttons above are: Insert New Table, Table Row Properties, Table Cell Properties, Insert Row Before, Insert Row After, Delete Row, Insert Column Before, Insert Column After, Delete Column, Split Merged Table Cells, Merge Table Cells.
To create a table, place the cursor into the document and select 'Insert New Table'. You will see a pop up window asking for how many rows and columns to create in the table (NB: You can change this later, this is purely for initial set up). Click 'Insert' to insert the table and you will see a dashed outline of a table appear in your document. You can place the cursor into the cells and they will expand and contract as you type and delete.
When the cursor is placed in a table cell some of the buttons on the table menu pictured above will become highlighted - meaning they can be used - and there is also a useful right click menu giving you options to add new rows and columns.
If you wish to fix the width of any table cells to a specified amount you can right click in the cell and enter the width and height in pixels (NB screen resolution is 72 pixels per inch, this may help to give you a rough idea of the values to enter into these fields).
Other Buttons Explained
 Insert Date
 Time
Time
 Emotions
 Toggle Full Screen Mode - Toggles your article editing window to the full size of your screen
 Text direction - Direction Left to Right and Direction Right to Left. These buttons allow you to enter or change the text direction, for example for languages that read right to left.
 Insert New Layer - Inserts a new layer of html that floats above the background html.
 Layer height - Move layers forward or backward.
 Toggle Absolute Position - For working with layered items.

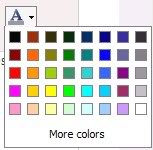 Select Text Color - Select the color of your text. This drops down to give you a choice of colors
 Insert Horizontal Ruler - Adds a horizontal ruler to your page.
 Toggle Guidelines/Invisible elements - Toggles the invisible elements of your article.
 Subscript, Superscript - For adding scientific notation to your text.
 Insert Custom Character - Choose from a selection of custom text characters.
 Horizontal Rule - Applies horizontal rule
 Cleanup Messy Code - This button allows you to clean up HTML code, perhaps from HTML text that you copied in from another source.
Editing in HTML mode
The rich text editor creates HTML code for the web. If you know any HTML it is also possible to edit this code directly be either clicking on the HTML button (  )or by clicking "toggle editor mode" at the bottom of the document.