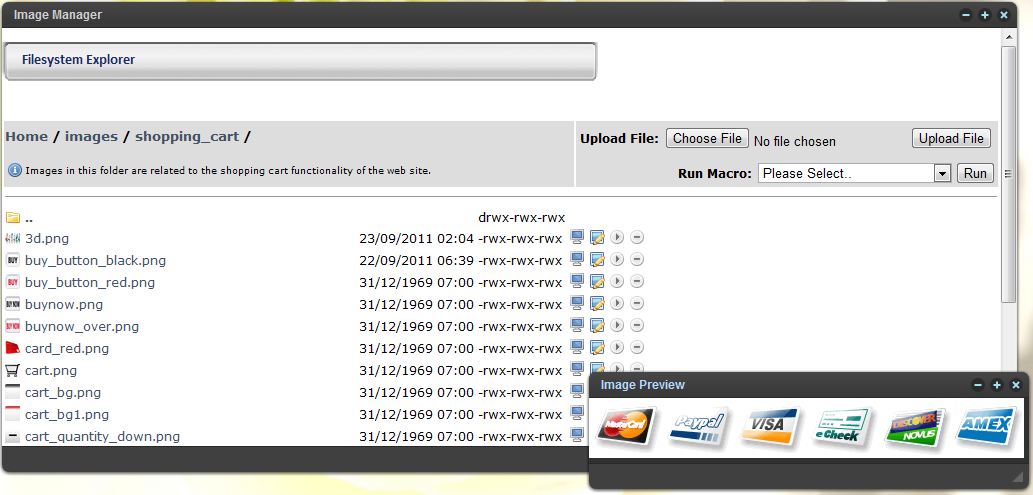
Fig 5.1 - Default image manager screen.

The Image Manager is available from this icon on the desktop, and it looks similar to any other file explorer.
See the accompanying screen shot for a preview of the image manager. You can view thumbnails of the images here (the screenshot shows an image being previewed in it's own window), rename and delete images and upload new ones.
You will also notice a number of sub-folders in here. Sections of the administrator which contain their own image upload fields will upload images to one of the sub folders in this directory. Note that whilst you can edit these images directory you should stick to uploading them through their specific sections, as in doing this you are also tagging the database record with the name of the image file as it is uploaded, thus saving yourself doing two jobs (one to edit the database record and one to upload the file separately, not to mention making sure you have entered the name correctly).
There is one folder called 'general images' however, which is made available to all of the 'Rich Text Editor' sections in the administrator. Consequently this is an ideal place to upload anything for general use on the web site as you will be able to find it easily when you come to embed it into the web site, which is covered next.
Inserting images from the 'General Images' folder into web pages
First find the record that you want to edit, and find the field for the record which opens in the Rich Text Editor. Place the cursor into the page where you want the image to display, then find the button that says Insert/Edit Image in the document editor toolbar and click it. Using the top field you can type in the url of any image on the web, however the next field down is a drop down list of all of the files that you have placed into the 'general images' folder. Select the image from the drop down list and it will preview in the preview pane below. You can edit the appearance (size, alignment) of the image using the second tab along on the Image Popup Window. Finally click 'insert' to place it into your document.
NB: Further options are available in the image popup window for things like resizing, applying padding and aligning images with other text, and these are covered more fully in the Rich Text Editor section.
Inserting other images into web pages with the Rich Text Editor

The purpose of the General Images folder is to give a quick and easy way to make a few images available to all sections of the web site. In fact, any image that exists in the master images folder and its subfolders can also easily be added.
As above, go into the rich text editor, place your cursor into the document and select the Images button from the toolbar. This time, note that on the right of the top field in the Imaages popup is a button. Click on this and you will see a screen similar to the one in figure 5.2.
Here you can navigate into any of the images folders by clicking on it in the main view pane. You can also use the search function on the left to find any image in any folder. Note that the search function will search through the folder you are currently in and any sub-folders, so if you are not sure where an image may be then serch for it in the root folder which is simply (Images) and tick the 'Search Recursively' button to recurse through all of the sub folders.
When you have found the image which you want to add, click the checkbox by the image and note that the lower left panel pops up with a button called 'Select'. Click on this and the image will be embedded into the first Images Popup. You can now continue to insert this image into your document and edit sizing or align/style options first if you wish.
The 'embedded image manager' form field type
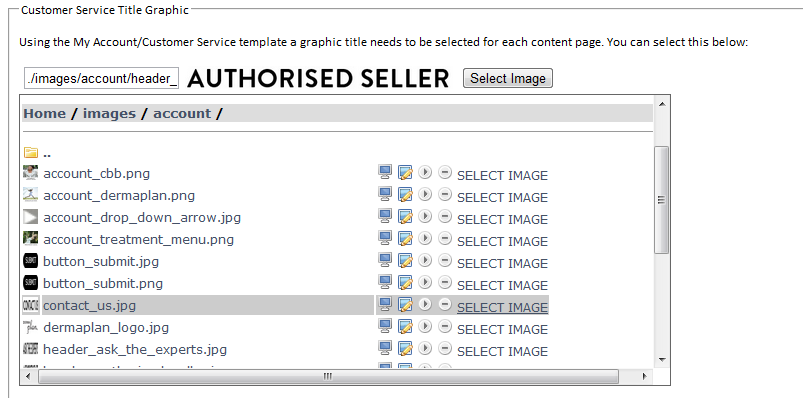

Some parts of your admin may be set up with the 'Image Picker' form field. This allows you to select an image but rather than from a drop down list, the image manager is embedded in the admin page.
The two digarams to the left show the initial screen before 'Select Image' has been clicked, and after, which causes the Image Manager to appear within the page.
Editing Images Online
An online image editor called Pixlr is available for editing images after you have uploaded them. You will see the icon by each image listed in the Image Manager, which pops up the tooltop 'Edit In Pixlr'. This has similar functionality to photoshop. Basic resizing is the most common task, and this can be done from the Image menu item at the top of the screen, where you can select how large you want the image to be. All kinds of functionality is available in here, we will go through this with you in person if you wish to make use of this facility.
For
further help and support, please contact Paragon Digital on 0775 646 0555.